Choose an installation surface
Anona Pano can be simply placed on a table or mounted to a ceiling. Refer to the illustrations below for the installation positions.

Mounted to a ceiling

Placed on a table
For on-top-of-a-table or nightstand placement, refer to the illustrations below for heights and widths.


Install the camera
Caution:
- Make sure your ceiling is sturdy enough for bearing the weight of the camera.
- For drywall ceilings, use a stud finder to locate a stud and be sure to drill on the stud.
- For solid ceilings, like those made of concrete and bricks, use correct fasteners. If unsure, consult an expert.
1. Press the mounting plate against the surface on which the camera is to be installed. Use a pencil (not included) to mark through the holes (A&B as shown right) on the mounting plate.

2. Drill a hole where the mark was made, being careful to use the correct drill bit by measuring the bit with one of the provided anchors.

3. Insert an anchor into each drilled hole and bolt the mounting plate using a Phillips screwdriver and the provided screws. Once again, use the correct fasteners for concrete ceiling.

4. Attach the camera to the mount by pressing it and turn it in the same direction on the mounted plate.
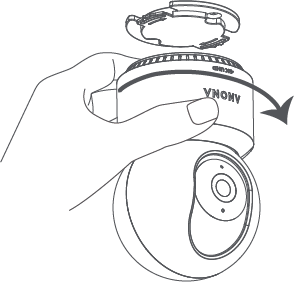
5.When finished, wiggle the camera a bit to see if it’s tightly attached. Fasten as needed.
6. Connect the camera to a compatible power source using the provided cable and adapter.
Invert the view
To fix the inverted view from ceiling mounting,
- Launch the Anona Security app, tap
 and find the camera.
 - In the interface that shows up, swipe up to enter settings.
- Tap Image settings > Rotate image.